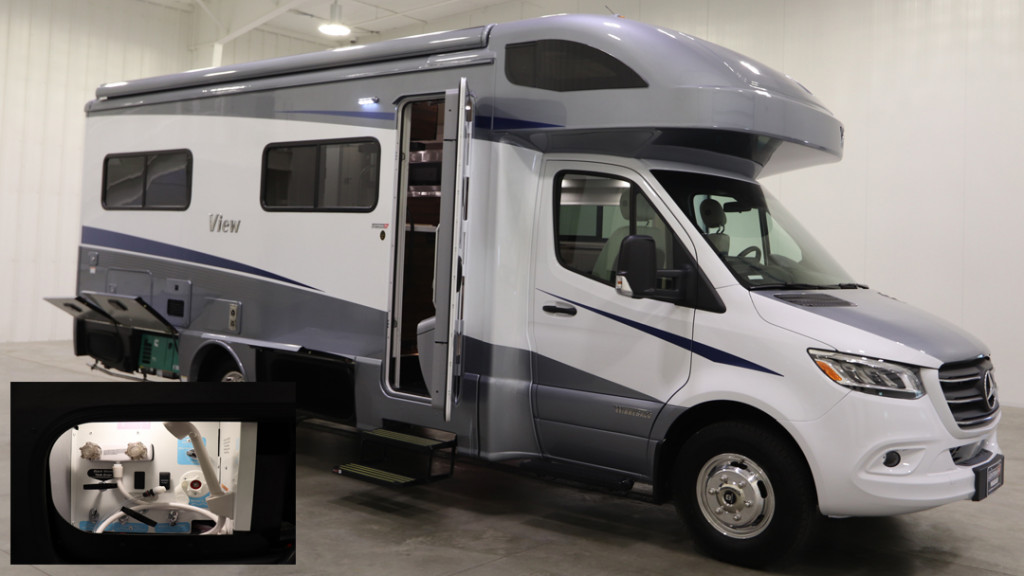
It’s that time of year when it may be time to put your Winnebago View or Winnebago Navion away for a winter slumber. Before you do this it is important to winterize your View or Navion.
Your Winnebago View or Navion is equipped with a manually operated waterline winterization system for your convenience in winterizing fresh waterlines. The system features a Winterization (diverter) valve with an antifreeze siphon tube to draw nontoxic RV water system antifreeze into the waterlines. There is also a Water Heater Bypass valve to avoid filling the water heater with antifreeze.
Watch our video on how to winterize a Winnebago View or Navion here.
Below you will find important steps to winterize your Winnebago View or Navion:
- Level the Motorhome. If the motorhome is not level, there may be “low points” in waterlines that can trap water in the lines and prevent it from draining properly.
- Drain Fresh Water Tank and Waterlines. Open all waterline drain valves and drain fresh water tank.
- Drain Exterior Shower/Wash Station. Open exterior shower knobs and lay shower head on ground to drain any water left in the shower line. Also, place the tip of your finger into the city water inlet and gently press the backflow valve “button” in the center of the inlet to drain any water trapped in the inlet line. Remove Water Filter
- Cold Water Filter: Remove the filter canister from the Cold Water Filtration System under the galley sink and discard the filter cartridge. After emptying the canister, remount it onto the filter assembly and continue the Antifreeze Fill Procedure.
- Drain Water Heater (Tankless): Turn the Water Heater Power Switch (located behind water heater access panel on exterior of the motorhome) to the OFF position and allow hot water to cool down.
- Open the latch with your thumb while pulling the Easy Drain Lever down as far as it will go.
- Remove the water inlet filter and clean with clean water. Leave the water filter inlet removed until the Winterization process is complete or the system is placed back in use. Set Up Winterization Valves
- Turn Winterization Valve 1 to BYPASS position (to avoid filling water heater with antifreeze). Water Heater Power Switch (Located behind water heater access panel on exterior of the motorhome) Easy Drain Lever (Located behind water heater access panel on exterior of the motorhome) Latch Easy Drain Lever
- Remove and save the protective cap from the end of the antifreeze siphon tube (save cap to cover tube after use.)
- Insert the end of the siphon tube into a pail or container with 2 to 3 gallons of non-toxic RV antifreeze solution.
- Turn Winterization Valve 2 so that it points to Winterize (Syphon). NOTE: Ensure that all drain valves are CLOSED before pumping RV antifreeze into the water system. Fill Lines.
- Turn the Water Pump switch ON.
- Open each hot and cold water faucet handle/ knob in the motorhome – one at a time each in turn until antifreeze solution just begins to flow from the faucet, then close. Do not forget exterior shower/wash station knobs (if equipped).
- Press the toilet flush pedal and hold until antifreeze begins flowing into the toilet. Leave a small amount of antifreeze that remains in the bowl.
- Turn Winterization Valve 3 from “Normal” position to “Line Drain” position to allow water and antifreeze to flow through the recirculation line. Note: antifreeze will drain outside of the coach during this step.
- Turn Water Pump switch OFF.
- Turn Winterization Valve 3 to “Water Heater & Line Drain” position to allow all remaining water and antifreeze to leave the system. Leave the valve in this position until the Winterization process is complete or the system is placed back in use.
- Turn Winterization Valve 2 so it points toward Normal. This will stop the flow from the antifreeze siphon tube and revert the tank line flow to the water pump.
- Replace the protective cap onto the end of the antifreeze siphon tube to keep out insects or debris when not in use. Fill Drainage System P-Traps
- Pour about one cup of RV antifreeze down each drain for the galley sink, lavatory sink, and shower/tub. This fills the drain trap pipes to prevent holding tank odors from entering the motorhome during storage. Dump and Clean Holding Tanks
- Completely drain the sewage and waste water holding tanks at an approved waste disposal site. Drain the sewage tank first so the following waste water can rinse any waste solids from the dump outlet and sewer hose.
- Close dump valves and refit the dust cap onto the drain outlet. This will inhibit rust formation on valve shafts and prevent entry and contamination by airborne debris, insects, and rodents.
You will find additional information on how to winterize your Winnebago View or Navion in your RV Owner’s Manual.
Winnebago View and Navions for Sale
Experience the Best® at Lichtsinn RV, we have been recognized as the #1 Winnebago Dealer in North America each year since 2015. Lichtsinn RV is located 1 mile north of the Winnebago Motorhome Factory in Forest City, IA and we proudly sell new Winnebago motorhomes and pre-owned RVs from various manufacturers. While at Lichtsinn RV, you can expect no delivery miles on new RVs, a complimentary half-day educational orientation of your RV, excellent guest reviews, an assigned support team from sales, parts, service and the business office, superior accommodations, no-hassle pricing and competitive financing. See our extensive new and used inventory here.
Posts You May Like:
Winnebago View vs. Winnebago Navion
Reviewing the Winnebago View and Navion Floorplans
The Winnebago View and Navion Mercedes Benz Sprinter Diesel Chassis
